You can replace a bathroom vanity light in a rental in about twenty minutes with a screwdriver, and as long as you keep the old fixture in a box and put it back when you leave, most landlords never know or care. I did it in my 480 square feet in Brooklyn for $94, after two years of a single frosted globe above the mirror that made everyone look like they'd been up for three days. This post is the whole thing: whether you're allowed to, how to actually do the swap, what to do if you're not comfortable touching wires (there's a plug-in route that looks just as good), which bulbs fix 60 percent of the problem for free, and the two mistakes I made so you can skip them.
I complained to my landlord exactly once. He looked at me like I'd asked him to install a pool. So, my own solutions. Four of them, in order of how much nerve they take, and you can stop at any point and still have a better bathroom than you started with.
Can a renter replace a bathroom light fixture?
Usually yes, with two conditions. Read your lease first; mine, like most New York leases, says I can't make "alterations" without written consent, and case law and common sense both treat swapping a light fixture as reversible if you restore the original at move-out. That's condition one: keep the old fixture, every screw, in a labeled box in the closet. Condition two: don't touch the wiring inside the wall. You're connecting a new fixture to the same three wires the old one used; you're not running new cable, moving the box, or adding a circuit. That's the line between "changed a light" and "did electrical work," and it's the line I'd never cross in a place I don't own.
If your lease says no alterations at all, or your building has a co-op board with opinions, skip to the plug-in section. It gets you 90 percent of the way with zero wiring.
One more honest note. I did email my landlord afterward with a photo and "I'll put the old one back when I leave." He replied "ok." That's the whole legal saga. Your mileage may vary, but most landlords care about holes in walls and unpaid rent, not a nicer light over the sink.
What was wrong with the original, in graphic-designer terms
A single 60-watt-equivalent globe centered above the mirror lights your face from above. Above means shadows under the eyes, under the nose, under the chin. It's the exact lighting a photographer uses to make someone look tired on purpose. Add a 3000K to 4000K bulb, which is what most rentals ship with, and the shadows go slightly green. I design for a living and I couldn't stand looking at a badly lit face every morning. The fix is the same principle as a good headshot: light from the sides, at face height, warm, diffused. Everything below is that principle in hardware.
Upgrade 1: the bulb (free, 30 seconds, do it today)
Before you buy anything, swap whatever's in the fixture for a 2700K LED, 800 lumens if there's a single bulb, 450 to 600 each if there are two or three. In my globe that alone cut the harshness by more than half. 2700K is the warm end of "white" without going orange; 3000K is fine if you prefer it crisper, but stop there. Look for a CRI of 90 or above on the box, because a cheap 80 CRI bulb makes skin look flat no matter what temperature it is. I keep the same bulb spec in every fixture in the apartment so nothing clashes; the rest of that system is in my five renter lighting rules.
Upgrade 2: replace the vanity light (what I actually did)
This is the one people search for and the one that's less scary than it sounds. Here's the sequence I followed, twice now, in two apartments.
Turn off the breaker for the bathroom, not just the switch. Flip the switch on and off to confirm the light doesn't come on, then test the wires with a $12 non-contact voltage tester when you get to them. Take the globe and bulb off, then the two screws or the decorative nuts holding the fixture base to the wall. Behind it you'll find a round or rectangular metal junction box with three wires coming out: black (hot), white (neutral), and bare copper or green (ground). Photograph how the old fixture is connected before you undo anything. Untwist the wire nuts, unhook the old fixture, and put it in the box you're keeping.
The new fixture comes with a mounting bar that screws to the junction box. Attach it, level it, then connect wires like to like: black to black, white to white, ground to the green screw or the bare wire. Twist on the wire nuts, tuck everything into the box, and screw the fixture base on. Bulbs in, breaker on, done. It took me 22 minutes the first time, including the nine minutes I spent finding the breaker, because the panel in my building is labeled "BATH?" in pencil.
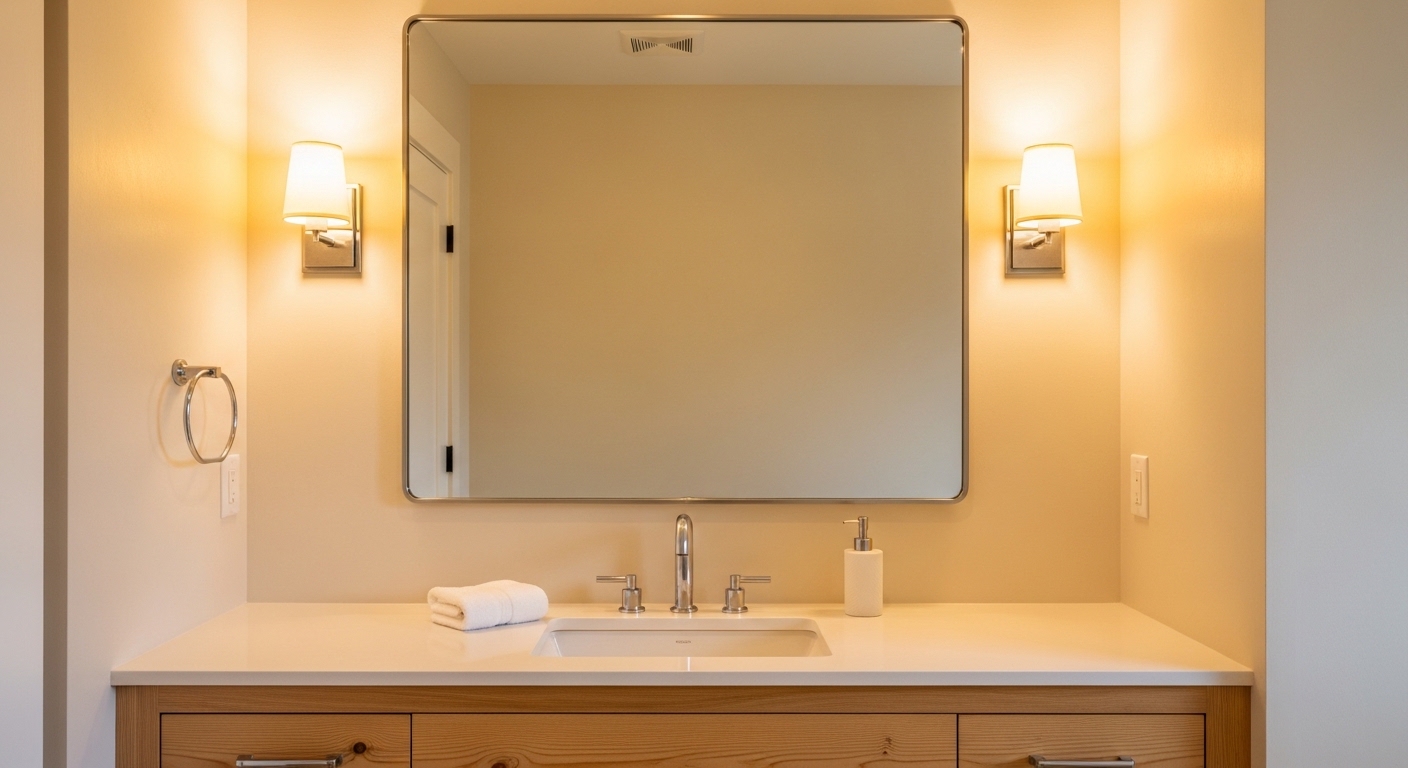
What I chose: a two-light bar fixture with opal glass shades, 24 inches wide, mounted where the globe had been, because the junction box is centered above the mirror and I wasn't moving it. Two lights spread across the mirror light your face from two angles instead of one, which is most of the fix. $79 for the fixture, $15 for two bulbs. If your box is above the mirror, that's your option. If you happen to have boxes beside the mirror, you're lucky, and a pair of bathroom sconces at eye level is the best face lighting there is.
Which vanity light should a renter buy?
Three rules, learned by buying wrong. Buy a fixture that mounts to a standard 4-inch junction box with a bar, not one that needs a recessed box or a specific backplate; the packaging will say "standard mounting" or show the bar. Buy one with replaceable bulbs rather than integrated LEDs, because when an integrated LED dies in year four you're replacing the fixture, and because replaceable bulbs let you pick 2700K and 90 CRI yourself. And buy something you'll want in the next apartment: a plain two- or three-light bar in black, brass or nickel with opal glass goes with every bathroom I've had, while the trendy sputnik thing I nearly bought would have looked wrong in two of them. Under $100 buys a good one. Over $250 buys a nicer finish, not better light.
Width: match the mirror or go narrower. Height: the bottom of the shades about 75 to 80 inches from the floor if it's above the mirror, so the glass doesn't sit in your sightline. Direction: shades pointing down light the counter and your face; shades pointing up light the ceiling and look pretty and do nothing.
Can I install LED vanity lights myself, or should I hire someone?
If the old fixture and the new one both connect to an existing junction box with three wires, and you can turn off the breaker and test the wires, you can do it yourself. That's what I did, and I'm a person who once called a super about a smoke detector chirp. Hire an electrician (in Brooklyn, $150 to $250 for this job) if any of the following are true: there's no junction box and the old fixture was wired direct into the wall; there are more than three wires and you don't know why; the wires are cloth-covered or crumbly, which in a pre-war building they can be; or the new fixture is an integrated LED with a driver and the instructions mention anything beyond black-white-ground. And if you're not allowed to, obviously, don't.
The other honest answer is that an electrician is worth it for one job you can't do yourself: adding boxes beside the mirror. That's real wiring inside the wall, that's a landlord conversation, and that's the one upgrade that isn't reversible. I didn't do it. The plug-in version below is the workaround.
Upgrade 3: plug-in sconces beside the mirror (no wiring at all)
This is what I'd do first if my lease were stricter, and it's what I added anyway because the two-light bar still lit from above. A plug-in wall sconce is a real fixture with a cord that runs to an outlet. Mount one on each side of the mirror at about 60 to 66 inches from the floor, roughly eye level for most adults, and run the cords down behind the mirror's edge to the outlet by the sink. Mine are on adhesive strips rated for 16 pounds; the sconces weigh under three. The mirror hides the cords almost completely, and the effect is side lighting that looks like a renovation.
Two things I learned. Use the fabric cord covers that come with some sconces, or buy a $6 cord cover in the same color as the wall, because a black cord on a white tile wall reads as "extension cord" and undoes the whole thing. And put both sconces on the same smart plug so one tap turns them on together; nothing looks less intentional than one lit sconce. The full test of the adhesive-mount sconces I've tried is in my no-drill sconce review, and the general how-to is in the plug-in sconce guide.
Upgrade 4: a rechargeable light where there's no outlet
Some rental bathrooms have exactly one outlet and it's already running the electric toothbrush. A small rechargeable sconce or a battery pendant on an open shelf adds warmth without any cord at all. Charge it like a phone every couple of weeks. It sounds like a compromise and it looks good, particularly as a night light on a dimmer setting. Mine lives on the shelf above the toilet and gets used more than the ceiling light after 9 pm.
What the whole bathroom cost, and what I'd change
Bulb, $4. Two-light vanity bar, $79, plus $15 in bulbs. Two plug-in sconces, $110 for the pair, plus $6 of cord cover and $9 of adhesive strips. Rechargeable shelf light, $38. Total: $261 for a bathroom that photographs like a hotel and a landlord who typed "ok." If I could only spend $100, it would be the bulb and the plug-in sconces; the overhead swap is the nicest to have, not the biggest change. The rest of what I did in this tiny room, including the $40 hardware refresh, is in how I made a tiny bathroom feel like a boutique hotel.
Mistakes, since I promised. First, I bought a three-light bar for the first apartment without measuring, and it was wider than the mirror, which looks like a mustache on a small face. Measure the mirror; the fixture should be the same width or narrower. Second, in this apartment I mounted the first plug-in sconce three inches too high because I measured from the vanity top instead of the floor, and the light hit my forehead. The spec is 60 to 66 inches from the floor to the center of the shade, not "roughly eye level," which is what I told myself the first time.
Putting it back when you move out
Breaker off, new fixture off, old fixture out of its box, same three wires, twenty minutes. Adhesive strips come off with the pull tab and a hair dryer if they're stubborn; I've removed six sets across two apartments with no paint damage, which is more than I can say for the picture hooks the previous tenant left. Keep the receipt for the new fixture. It's coming to the next apartment with you, along with the sconces, the smart plug, and the box of adhesive strips, which at this point is the most-moved object I own.
Shop this post: bathroom sconces, plug-in wall sconces and vanity mirror lights